No-till gardening is a method using cardboard or newspaper, compost, and mulch to suppress weed growth, improve soil structure, and provide healthy soil to produce a high-yield vegetable crop. Read on to learn about the pioneers of no-till gardening methods such as the Back to Eden, no-dig, and no-work methods.
You can watch the two videos below on building in-ground no-till garden beds. The first video is on our new farm in South Carolina, but if you scroll further down in this post you’ll see how we used this method on our old farm in Arkansas.
What Is No-Till Gardening
There is no “right way” or “end all” method for the organic gardener. It all depends on the area you are in, the resources that are available, and the lay of the land.
Over the years, I have incorporated many methods on our farm such as growing in-ground with the no-till method as well as tilling. I’ve grown in raised beds, used creative and cheap container gardening, tried vertical gardening on cattle panel trellises, used Greenstalk Vertical gardening, and even grown vegetables directly in soil bags.
No-till gardening is a method in which one does not disturb the garden soil with machines, tillers, or shovels, but is continually layering organic material to the top surface of the soil year after year.
Tilling and turning up the soil can bring weed seeds to the surface for germination, and the disruption of the soil causes it to compact making it difficult for plants to thrive.
The layering of mulch and compost each year mimics nature, creates an environment with fewer weeds, and provides a permeable structure for seedlings and roots to expand and grow.
I am a big advocate for no-till (or no-dig) gardening because you can duplicate it anywhere. Additionally, it improves soil health as well as soil structure, something desperately needed with our South Carolina clay!
Benefits of a No-Till Garden
No-till gardening has many great benefits.
- It is easy and time-saving.
- No-till has been proven to have a higher-yielding of crops. More crops mean more food on the table.
- It helps soil retain carbon making it more fertile.
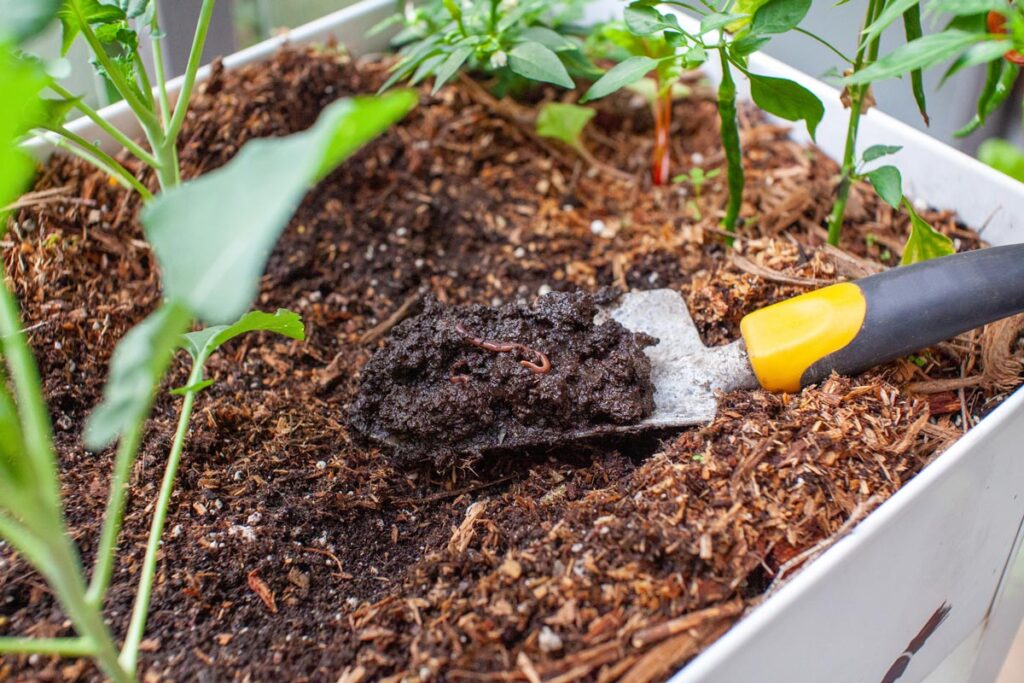
- It creates a cyclical relationship between earthworms and the soil. Because the soil is rich in nutrients, earthworms are attracted to it. Earthworms produce tunnels creating the natural aeration and drainage, and consequently, leave behind worm castings providing additional nutrients in the soil.
- It improves water retention which means less watering during the growing season.
- A layer of mulch reduces weeds, and that means less weeding.
- The mulch also helps provide structure, making the soil less prone to erosion.
As I always say, the Earth is a modest lady, and if she has bare ground, she’ll find a way to cover herself. More times than not, that’s with weeds!
So a nice covering of mulch protects the earth and keeps the garden weed-free (or with fewer weeds that pull up very easily).
My Favorite No-Till Methods
- No-Dig Gardening – A method developed by Charles Dowding that focuses on a no-dig garden approach beginning with a cardboard layer that suppresses weed shoots from growing up while allowing plant roots to grow down. Additionally, adding compost to the topmost layer of the soil each year. He is one of my favorite resources on no-till gardening and is where I have done a lot of my research.
- Back to Eden Method – A gardening method developed by Paul Gautschi that uses nature as a blueprint on how to amend the soil. This method mainly uses wood chippings as a top mulch which breaks down year over year into perfect neutral soil with a pH of 7.0. This method requires approximately 4-6 inches of mulch, with finer sifted mulch where you’ll be planting seedlings. Then a reapplication of about 2 inches of fresh woodchips every two years.
- No-Work Garden – Ruth Stout was nicknamed the “Mulch Queen” for popularizing mulching by using mainly hay or straw, and other organic materials as ground cover. We’re using this method on our potato rows this year and have been very pleased with the results.
I am using a combination of all these methods to create my no-till garden beds here on our new farm in South Carolina.
The Difference Between Compost and Mulch
When following this no-till method, it is important to understand the difference between compost and mulch.
Compost is decayed broken-down organic material that can be added to your soil to improve its nutrient composition.
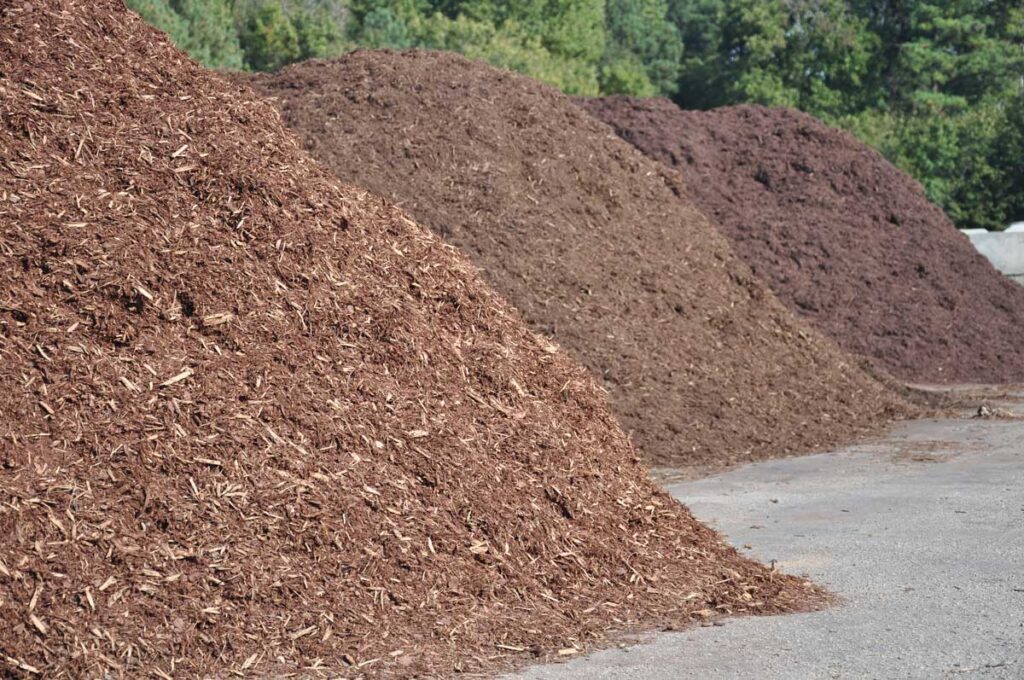
Mulch is decaying debris that has not fully broken down, such as wood chips, leaves, grass clippings, and straw. Mulch helps keep moisture in the ground and blocks sunlight from weed seeds that would otherwise germinate and grow, but won’t immediately “feed” your plants like compost will.
Over time, as the mulch breaks down, it will bring nutrients back to the plants, but it’s not immediate.
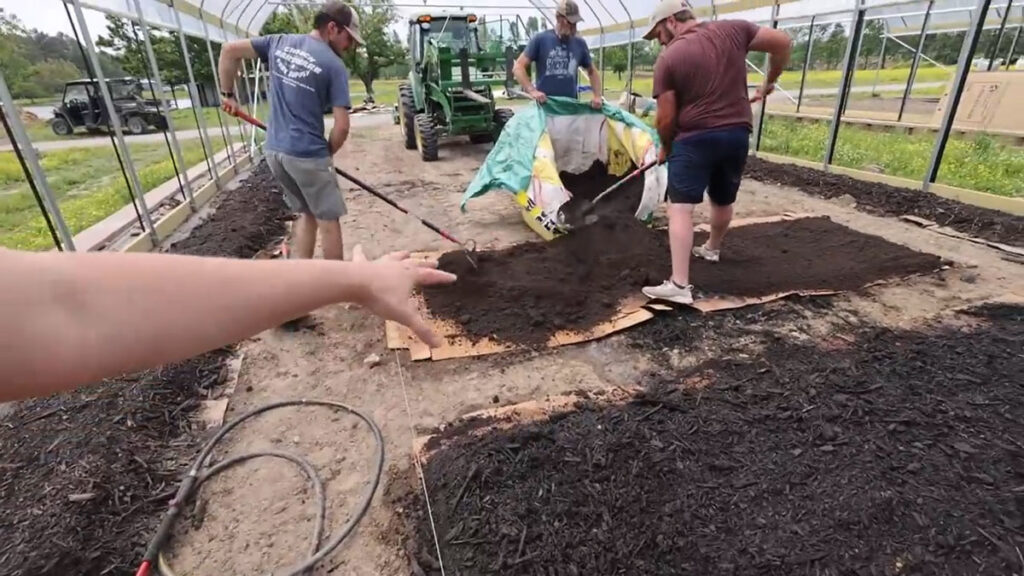
In the photo above you can see us adding a nice thick layer of compost-rich soil to the bottom of the no-till garden beds, then we cover that with a thick layer of woodchips.
Supplies for No-Till Gardening
- Space – The amount of space needed can be anywhere from a pot on an apartment balcony to a full in-ground vegetable garden bed.
- Compost – You’ll need good rich compost so your plants, seedlings, or seeds have good nutrients for growing. Learn how to start a compost pile with this step-by-step tutorial.
- Water – Applying water with a hose will be ideal for large spaces, but a watering can is sufficient for smaller ones.
- Mulch – This can be broken down woodchips, leaves, grass clippings, straw, or any combination of these. Pro Tip: Many people say not to use fresh woodchips, but if that’s all you can get it’s always worth a try. Some people say they will steal nitrogen from your plants, but if using fresh woodchips is the only way you can grow a garden this year, it’s worth a try! They will continue to break down and the following year you’ll still come out ahead.
- Cardboard or Newspaper – I underestimated the amount of cardboard I needed the first time, and do encourage you to collect more than you think you might need. Remove all packing tape, and break down flat. If you’re dealing with stubborn grasses like quack grass or Bermuda grass, I recommend using a couple of layers of cardboard and watering them well to suffocate all grass from pushing through into your garden beds.
- Plastic Garden Sheeting – If you have time to build your garden, covering it with large plastic sheeting will help eliminate many of the weeds and weed seeds. Anything that blocks the light such as a tarp can also be used. In our first no-till garden, we were able to repurpose a billboard vinyl. Get creative!
Starting a No-Till Garden Space
Primary Method
This sheet mulching method is ideal to start about six months before planting.
- Lay out cardboard in a single layer for the amount of space you intend to garden.
- Water cardboard until it is completely soaked.
- Layer 3 to 4 inches of compost on top of the cardboard.
- Water the compost well.
- Cover the space with garden sheeting to keep the soil in place and weeds from sprouting.
- In about 6 months, the cardboard will have broken down, and the space will be ready for planting.
- Remove the sheeting, plant as usual, and when seedlings have emerged, mulch all around the seedlings and throughout the garden bed to retain moisture and block out weed growth.

Quick Start Method
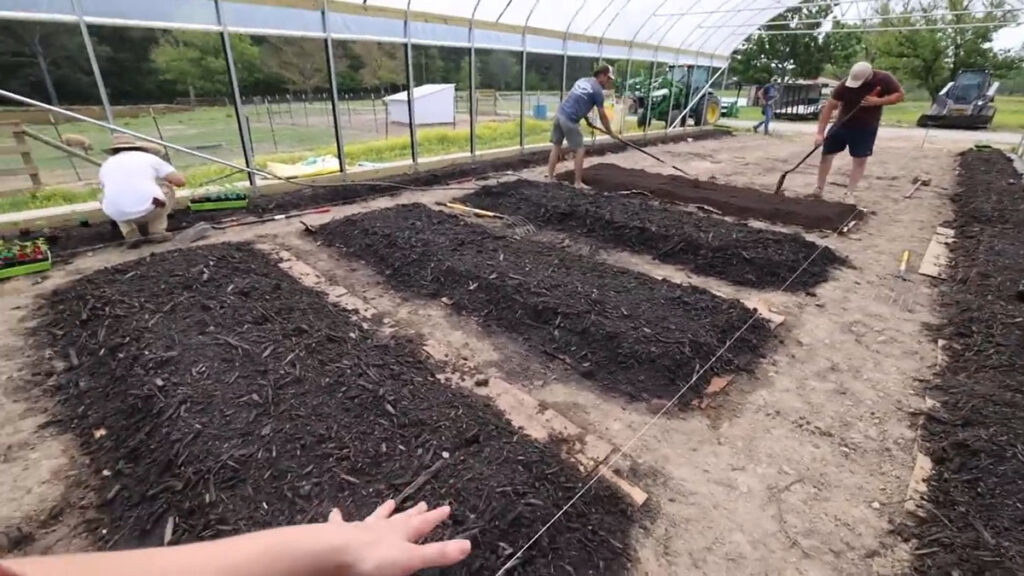
If you don’t have six months prior to planting, you can also establish a no-till garden with this alternative method, this is how we quickly built no-till beds on our new farm in South Carolina.
- Begin by tilling the top few inches of soil over the garden space. This will be the only time this area will be tilled.
- Pull any rocks or big weed roots out of the freshly tilled soil. The more meticulous the better your results will be!
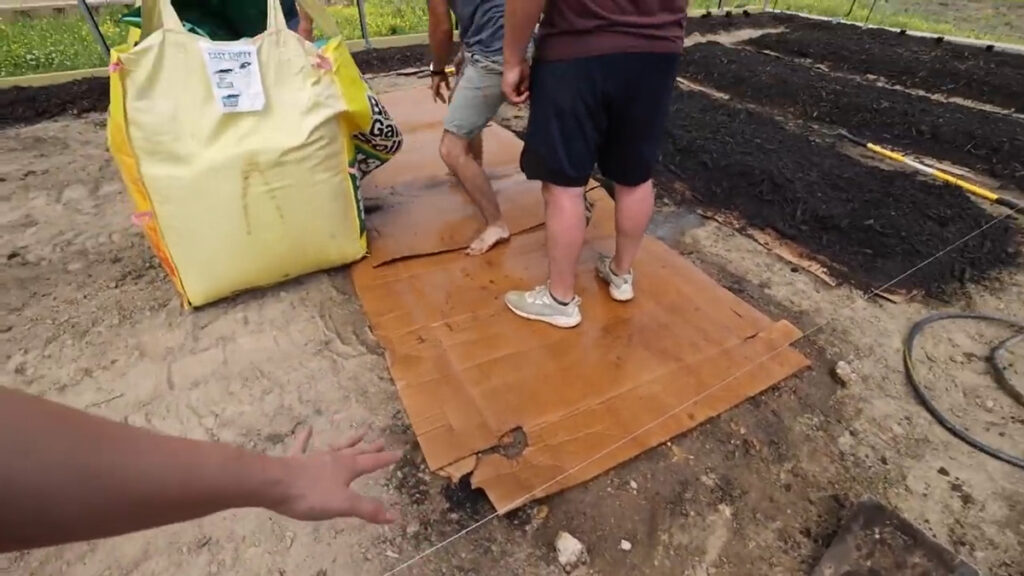
- Lay cardboard down in a single layer covering the entire garden area.
- Water cardboard well.
- Lay 3 to 4 inches of compost down.
- Water the compost well.
- Top the compost off with broken-down mulch.
- Keep moist by watering at least every other day for two weeks until everything is saturated and decomposing. Pro Tip: If you begin planting before the cardboard has a chance to decompose enough for the plant roots to grow through, poke a hole through the cardboard so that the plant does not become root-bound or form too shallow of a root system to support the plant’s growth.